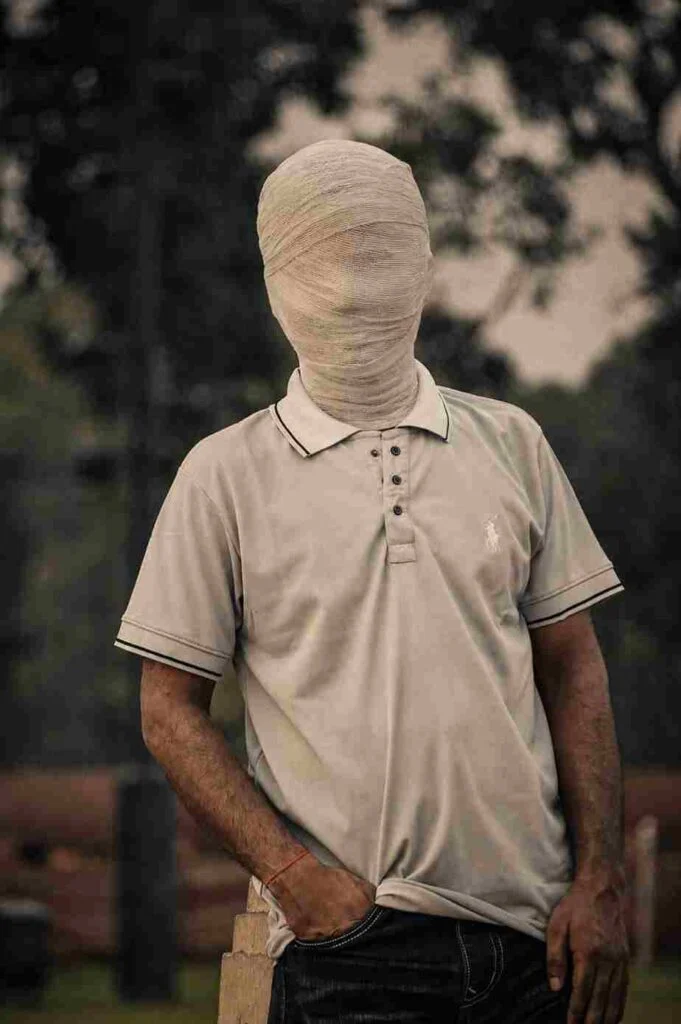
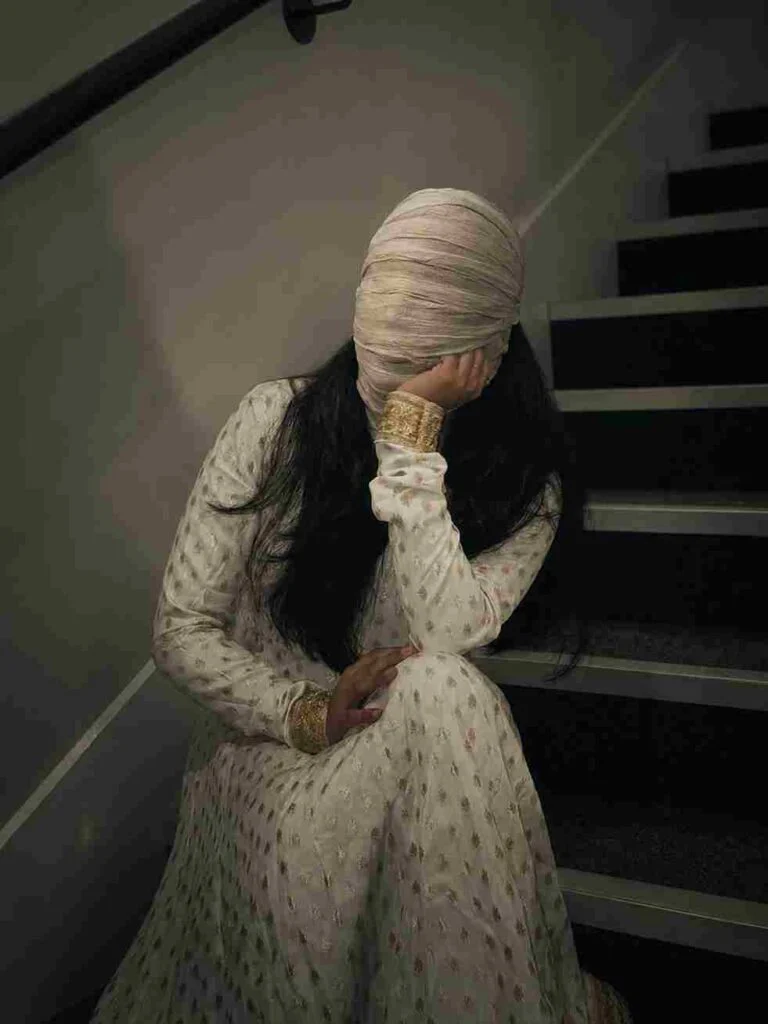
Have you seen those dramatic photos where the face is covered with bandages and the whole picture has a dark cinematic feel? You can create a similar look from a normal portrait with a simple photo editing prompt.
The bandages, shadows, fabric details, and overall mood can completely change the appearance of your picture. You don’t need to spend hours doing the editing yourself. Just use a suitable prompt with a photo editing tool and adjust the result until it looks right.
In this article, you’ll find a Viral Face Bandage Photo Editing Prompt 2026, easy steps to use it, useful editing tips, common problems, and a few ideas to help you get a better-looking result.
What Does the Face Bandage Effect Do?
This effect gives your normal portrait a completely different appearance by covering the head and face with layers of cloth bandages. The aim is to make the wrapping look believable while keeping the original pose, clothes, body position, and background intact.
For a good result, the prompt should mention important details such as
The dark cinematic mood
Where should the bandages be placed
The type and texture of the cloth
How tightly the bandages are wrapped
The original pose and body position
Lighting and shadows
The background
The overall photo quality
Why People Like This Photo Style
The bandaged-face style has a dark and mysterious appearance that immediately catches attention. It works especially well for profile pictures, social media posts, creative portraits, and cinematic edits.
Some reasons people enjoy this style include:
Gives an ordinary photo a completely different look
Creates a dark and mysterious mood
Works well with cinematic photography
Easy to customize
Looks interesting in social media posts
Allows you to experiment with different backgrounds and lighting
Create an ultra-realistic cinematic portrait using the uploaded photo as the exact reference. Preserve body proportions, pose, posture, hands, arms, clothing, accessories, camera angle, composition and framing unchanged. Completely wrap the entire head and face in thick, opaque off-white cotton bandages with overlapping layers. Fully cover hair, forehead, eyes, eyebrows, nose, cheeks, mouth, jawline, chin and ears. No facial features, skin, gaps, openings or recognizable face shape should be visible. Keep the original background unchanged. Apply a dark moody cinematic color grade in the photo, deep shadows, subtle warm highlights, atmospheric haze, natural HDR, contrast and film grain
AI Image Prompt
Create an ultra-realistic cinematic portrait of the same young girl using the uploaded photo as the exact reference. Preserve her body proportions, pose, posture, hands, arms, clothing, accessories, camera angle, composition and framing completely unchanged. Completely wrap her entire head and face in thick, opaque off-white cotton bandages with realistic overlapping layers and natural fabric texture. Fully cover her hair, forehead, eyes, eyebrows, nose, cheeks, mouth, jawline, chin and ears. No facial features, skin, gaps, openings, exposed hair, or recognizable face shape should be visible. The bandages should look naturally wrapped around the entire head with realistic folds, compression, shadows and subtle fabric imperfections. Keep the original background completely unchanged. Apply a dark, moody cinematic color grade with deep shadows, subtle warm highlights, atmospheric haze, natural HDR, rich contrast, realistic skin-independent lighting, fine film grain and dramatic cinematic depth. Maintain photorealistic details, natural lighting, realistic proportions and high-end cinematic photography quality. Do not add any extra objects, people, text, logos or background changes.
How to Create the Bandaged-Face Photo
Follow these simple steps to create your edited portrait:
Choose a clear portrait with good lighting and a visible face.
Upload the photo to your preferred AI photo editing tool.
Copy the Face Bandage AI Prompt provided above.
Paste the prompt into the AI editor and generate the edited image.
Check the placement, size, and texture of the bandages.
If necessary, regenerate the image with more specific instructions.
Download or save the final result in high resolution for social media.
Tools You Can Try for This Effect
There are several photo editing tools you can use for this type of portrait. Some are better for quick edits, while others give you more control over the final picture.
ChatGPT: Useful for creating and editing images with written instructions.
Google Gemini: Can be used for photo generation and editing.
Adobe Photoshop: Better when you want more control over individual parts of the picture.
Canva: Handy for simple edits, backgrounds, and social media designs.
Picsart: Good for creative photo effects and portrait editing.
Fotor: Useful for quick photo enhancements and creative edits.
Simple Tips for a Better Result
A few small changes can make a big difference in the final picture:
Start with a sharp, high-quality photo.
Choose a picture with good lighting.
Avoid very dark or blurry images.
Describe the bandage texture clearly.
Tell the editor to keep the original pose and clothes.
Make sure the shadows match the existing lighting.
Don’t add too many effects at once.
Keep the fabric details natural.
Try more than one version if the first result doesn’t look right.
Check the final picture carefully before sharing it.
Common Mistakes to Avoid
Sometimes the result may not look exactly as expected. These are some common problems to watch for:
Low-Quality Photo
Face Changes
Large Bandages
Wrong Lighting
Over-Smoothing
Too Many Effects
Poor Placement
Unnecessary Background Changes
Excessive Injuries
Skipping Review
Final Words
The Face Bandage Photo Editing Prompt 2026 can turn a simple portrait into something much more dramatic and unusual. The main thing is to start with a good-quality photo and describe the bandage style clearly.
Don’t worry if the first result isn’t perfect. Try a few small changes to the prompt, especially around the fabric, lighting, and placement. With the right photo and a little experimenting, you can create a strong cinematic portrait without complicated editing.
Frequently Asked Questions
Use a clear description of the bandage material, layers, folds, shadows, and placement. It also helps to match the lighting of the bandages with the original photo.
Yes. You can keep the original background while changing only the face and adding the bandage effect. Simply mention in your prompt that the background, surroundings, and lighting should stay the same.
Try the prompt again with more specific instructions. A better source photo, simpler lighting, realistic bandage details, and fewer extra effects can usually produce a cleaner result.